
This week, Benchmark’s resident Fixpert, Maya Alvarado transforms nutcrackers into bleach bottle openers, finalises two pairs of adapted nail clippers for limited hand dexterity, and makes a plastic art tray test for a young woman with autism…
05:55: I wake up and get ready for work. I make a smoothie with coconut water, blueberries and plums.
07:05: I arrive at Benchmark and take out some nutcrackers that I have brought in to experiment with. They have been the most successful tool so far to open bleach bottle caps easily, but need encasing in more comfortable handles.

07:15: I sketch around the outside of the nutcracker on a piece of paper and use this as a stencil to cut a piece of plywood to fit. A little bit of duct tape is enough to quickly test the positioning. Having a straight edged handle does not allow you to get in close enough, so I sketch another squiggle. This is top-heavy to allow it to sit into your hands. It works well and could be a good option. Considering the fact that the device may be used with the bleach bottle being held in your lap, there is not a great deal of space to work with. The arms of the nutcracker need to be shortened to create a smaller tool.

07:45: Having cut away the arms of the nutcracker in the metal shop using an angle grinder, I attach what’s left to smaller plywood handles. I use a Forstner drill bit to remove the rounds of the handles, and then remove the rest of the material using a jigsaw (a power tool cutter that can cut inside material from the holes created). Providing that the user’s fingers can be bent easily, these handles will provide a better grip. The tops of the arms meet at an angle to allow the nutcracker to open wide.

08:30: There is a lot of material, so I create a slimmer and simpler option with bent steel rod. Nemo lends me his blow torch to heat up the rods in a vice, and I lock them into some tubing that I use as leverage to bend a 90-degree angle. These may need wider grips on the handles to feel more comfortable in the hand, but I now have three options to test out and get some feedback.

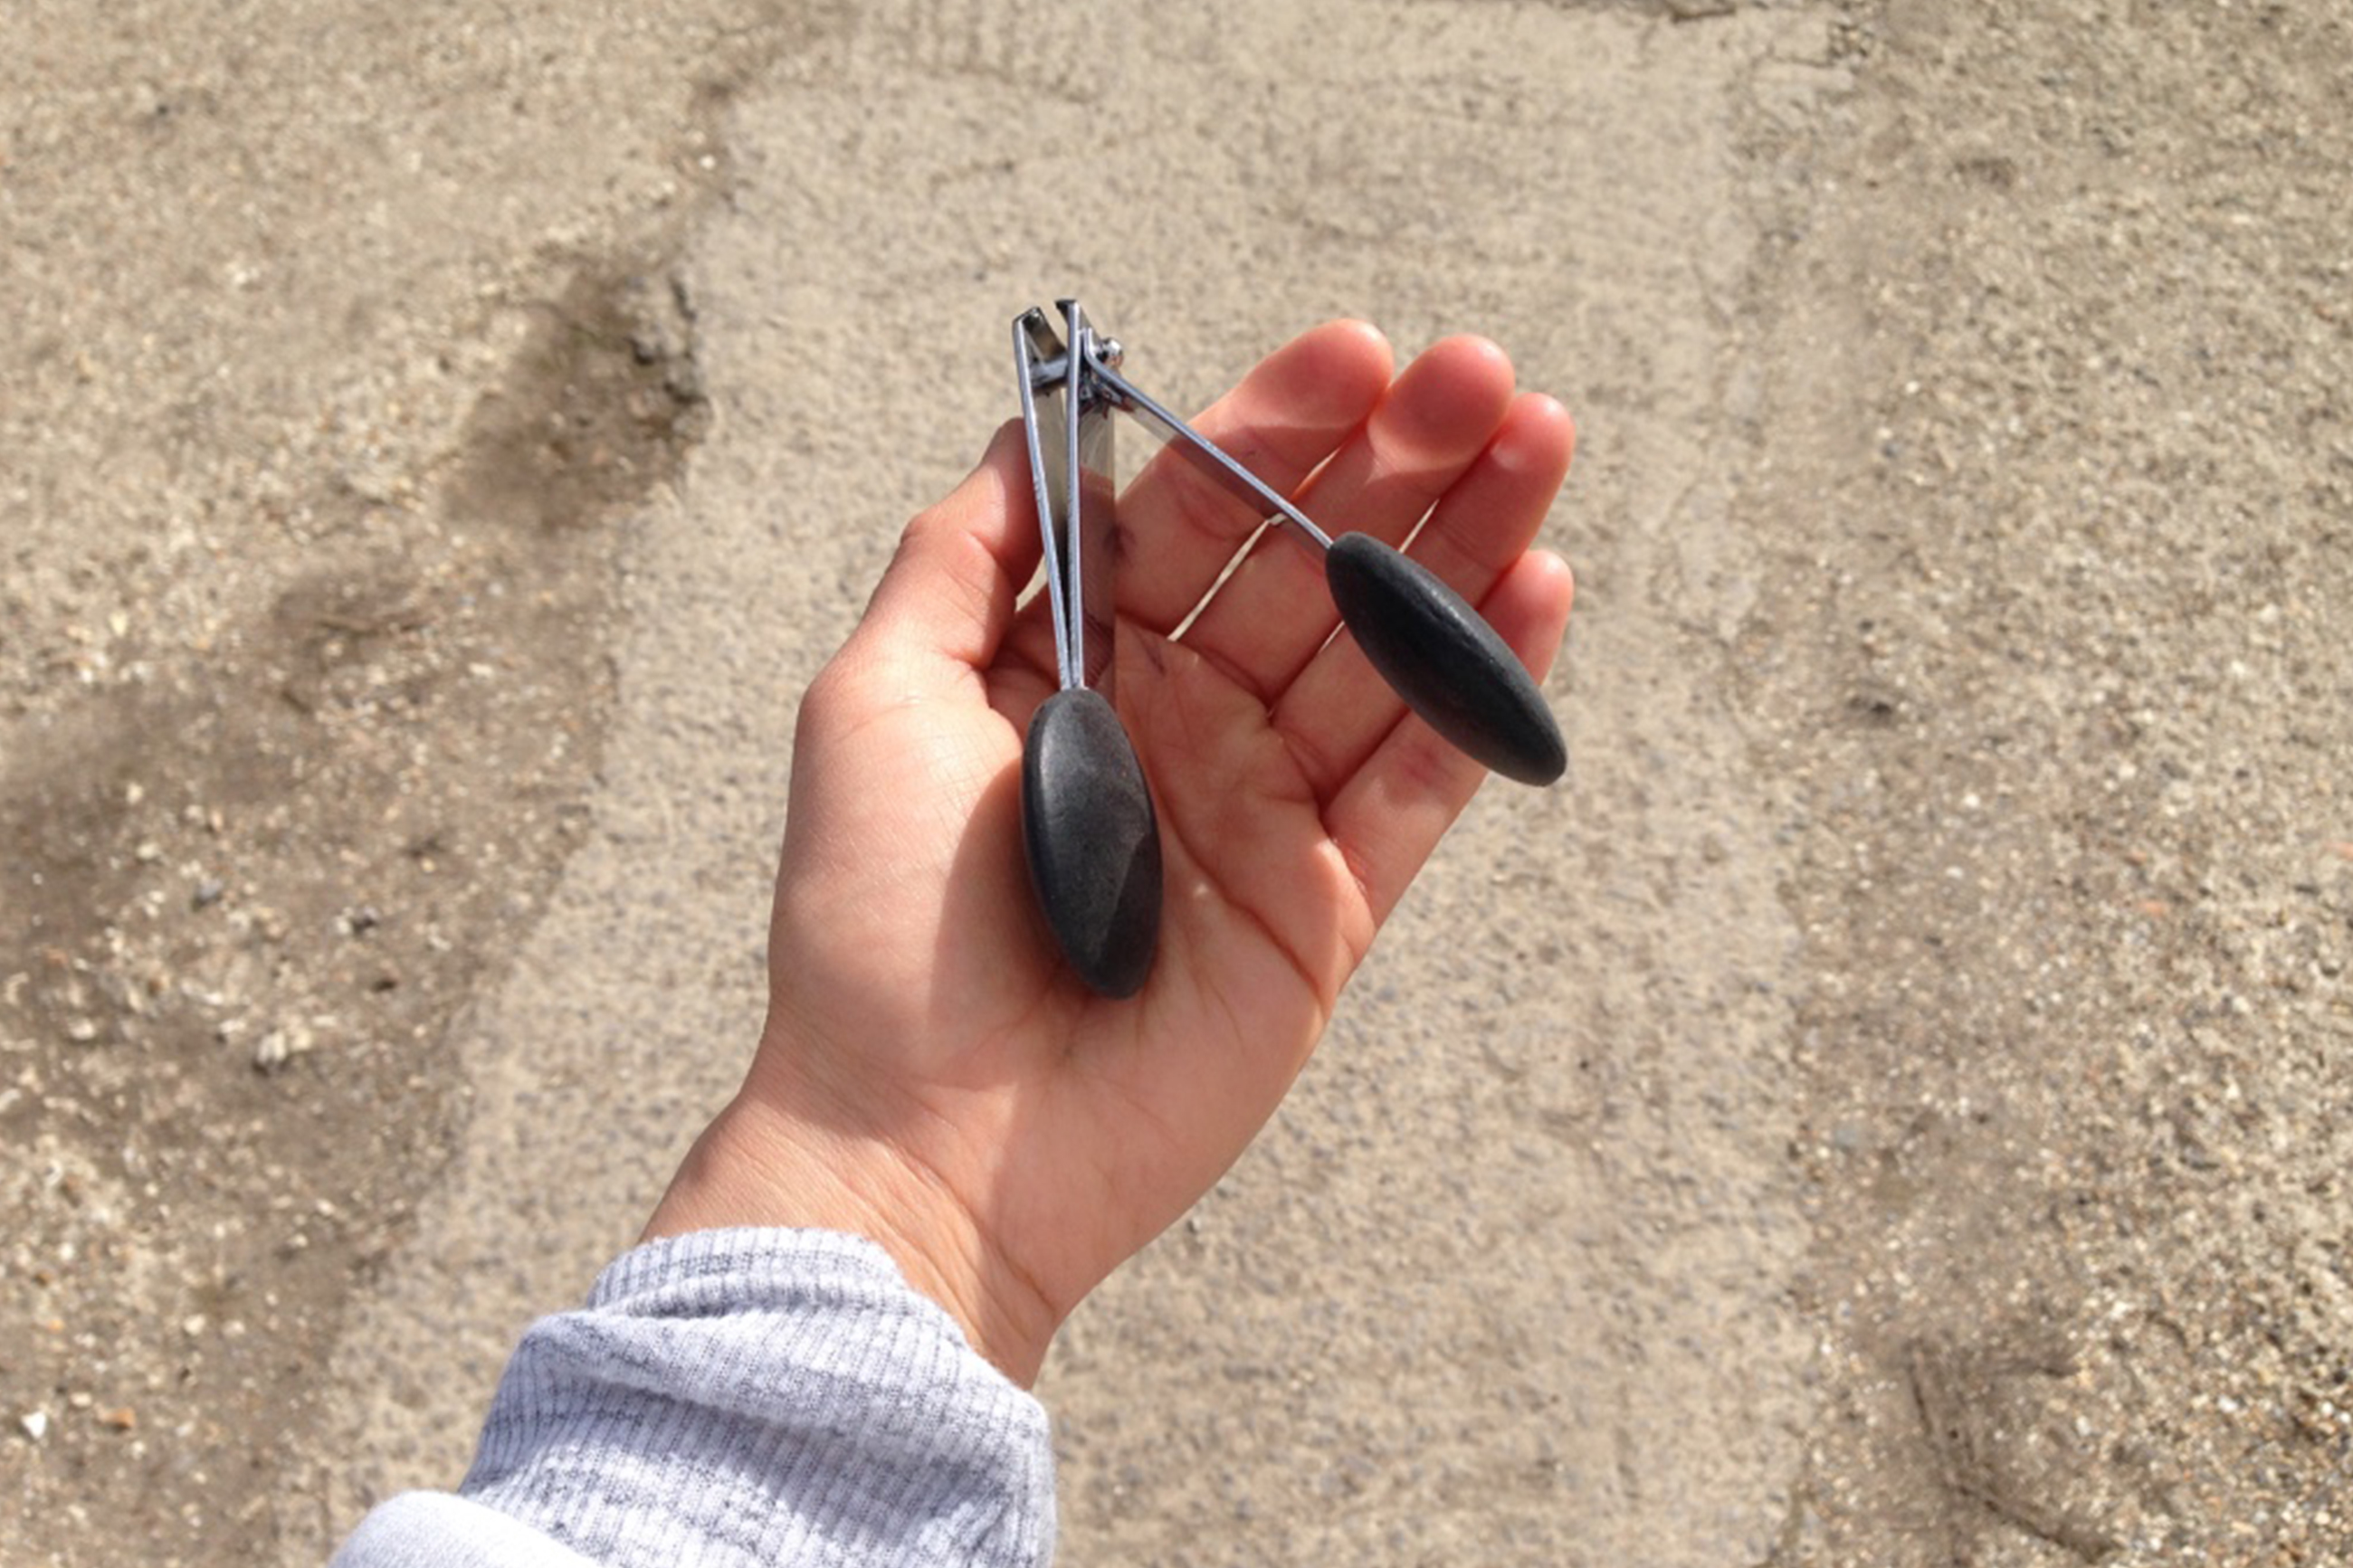
09:15: Moving onto my next project for the day – Sylvi’s nail clippers – I mark out some circles on a piece of plywood sheet, which I will use to align a hole saw drill bit without the inner drill piece to cut the circles out. These will act as extensions for Sylvi’s nail clippers. I met Sylvi, who suffers from arthritis, virtually through her daughter on Twitter. Having sent a number of prototypes through the post, and received video feedback online, this will be the final pair that incorporates the optimum size and grip features. I draw around each end of the clippers in the centre of each circle to mark the material that must be removed to hold the metal in place. Before drilling the circles, I use a router – free-hand ( ie without a jig to follow, so more control needed) – to create these grooves. As I go, I slide in the nail clippers to check that they fit well. The two circles will sandwich together.
10:00: Tea time – it is someone’s birthday, so cookies and doughnuts today – mmm!

10:15: I cut the circles out and chamfer (sand at an angle) the edges so that they will sit nicely in the palm of Sylvi’s hands. With a little masking tape around them, I check that they are working well.

10:45: I use Araldite glue to close the circle sandwiches. This creates a very tight bond. I leave them in hand clamps to dry.

11:15: Now that they are dry, I sand off the excess glue from the edges and smooth the surfaces until they are even. Using tape, I mask off the metal of the nail clippers to prepare them for spraying. When I spoke to Sylvi on the phone last week, she requested a rubberised grip surface, so I will use Plastidip spray to achieve this.

11:45: I apply light coats of spray to the circles, leaving them to dry for intervals of thirty minutes, while I start work on another prototype for the art tray I am making for Philly, a young woman with severe autism who lives in the Old Vicarage care home in Hungerford.

12:00: From the measurements of her existing tray I took last time I visited her, I make a template for an angled surface. I create a half tray, enabling me to use an off-cut of acrylic that I found in the rack at Benchmark. This will be enough to test if it slides on well to the arms of Philly’s wheelchair, and the most suitable angle for sketching. I cut the main body out with the band saw, and the curve with a jigsaw.

12:45: I use a heat gun to melt the plastic – ready for bending into shape. I fold one edge around a curved piece of wood, and clamp it in place with another until it dries.
13:00: Lunchtime and Benchmark chef Jo makes a delicious sausage casserole!
13:30: Using the same process, I heat the rest of the net along the marked areas and fold it around into shape.

13:45: The outer edge is a radius that will slide onto the curved arm of the chair. I use a long handrail that I find in the warehouse as a former to wrap around. Pete helps me to support it, whilst holding the soft material in place.

14:15: Philly can secure pieces of paper with a bulldog clip. One difficulty in the previous prototype was for Philly to tear off the pages, so I want them to be able to come off more easily in this one.

14:20: Another important aspect of Philly’s drawing ritual is searching for the pens, pencils and crayons in the pot. The sounds and feel of the tools moving around together is a sensory experience, and was lost in the strung up pencils of the previous prototype. I make a little plastic pot to sit on the side of the art tray. I am looking into retractable cables to secure the equipment to the pot, but still let them come out at a good length for drawing.

14:45: In the final version, I plan to create the pot out of the same sheet of acrylic, but for now, I drill a hole and bolt it to the side of the tray.
15:00: I leave Benchmark to make my way to see Philly.

15:40: At The Old Vicarage, I test the half tray on Philly’s chair. It sits on well. I think that the angle of the paper rest could be slightly less steep, but her carers agree that it is not too tall as to be obtrusive. The pot’s position is too far forward, so I will move that a bit further back to be closer to her hand.

16:15: Before I leave, I take a look in Philly’s bathroom and I see that the toothbrushes are living on the sink. They have been taken out of their packet and Dave said that she has been holding them. I have brought along one with a smaller brush to try out. There is a longer process of Philly familiarising herself with the tools and the actions, but it is fantastic that this can develop with the help and persistence of her carers at the home. As developments occur, I can make adjustments and new prototypes.

17:00: Back at Benchmark I see that Sylvi’s nail clippers have dried well and that the Plastidip coating creates a good amount of friction.

17:05: I want to create a pair that can be made at home with Sugru, so other people can learn from this Fix. I try it out with a few packs of white. I use two small packs per circle and finish off the surface with hot soapy water.

17:30: They look and feel good, but the real test will be tomorrow once they have dried fully. I hang them up with a string to dry overnight.

18:00: I head home to Hungerford and look forward to getting feedback for the new nail clippers.

Further reading for the especially geeky:
- A day in the life of the Benchmark Fixperts Resident – Week 26
- A day in the life of the Benchmark Fixperts Resident – Week 25
- A day in the life of the Benchmark Fixperts Resident – Week 24
- A day in the life of the Benchmark Fixperts Resident – Week 23